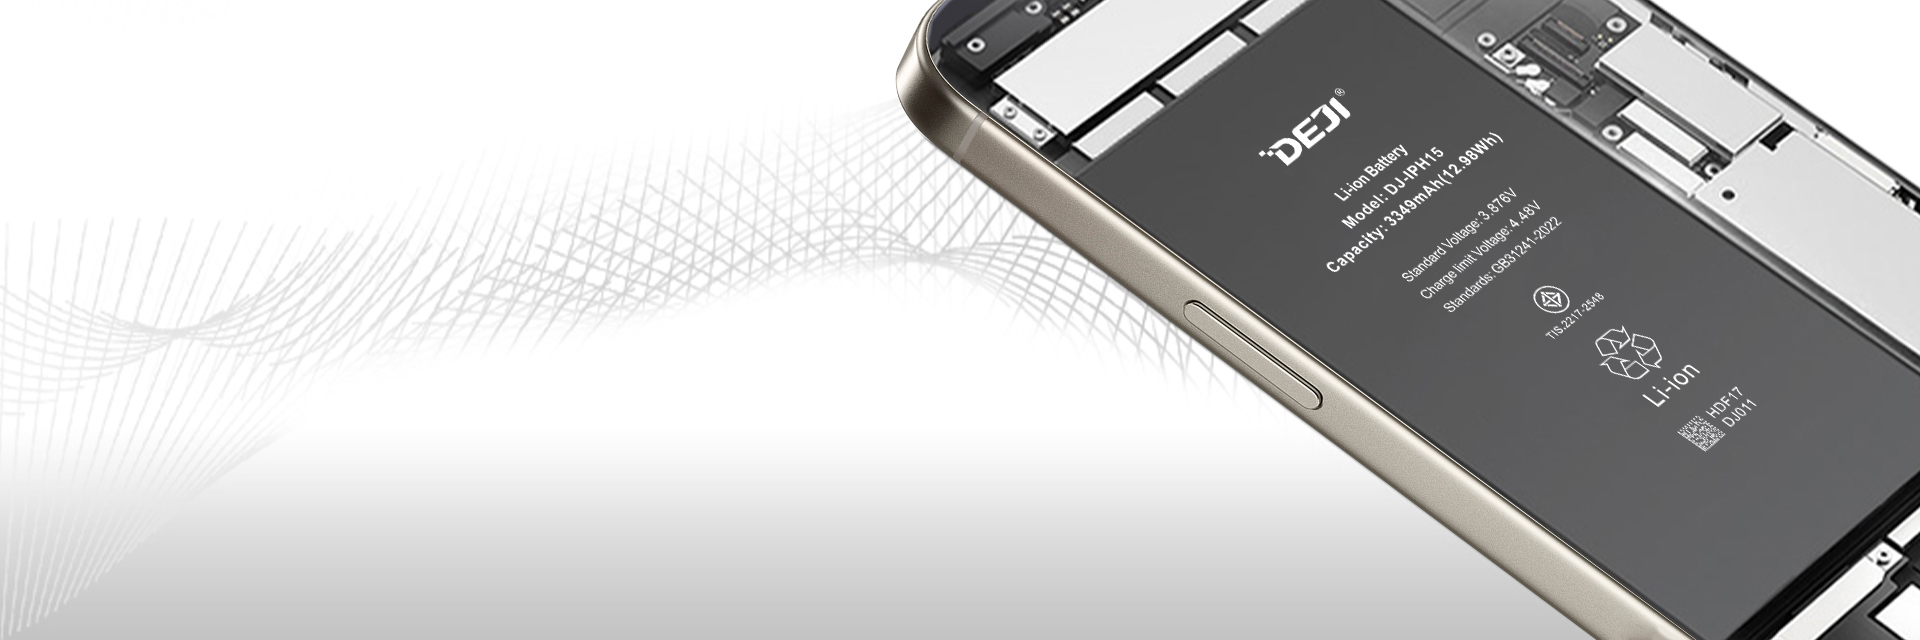
Generally speaking, when the battery charge cycle of the iPhone reaches 500, the battery life will drop to 80%, and then the battery life of the iPhone will decrease significantly. Due to the poor battery performance, the running speed of the iPhone will also be correspondingly slower. If you want to replace the battery of the iPhone X yourself, you can refer to this tutorial.
Things to note before starting:
If you do not have professional tools and sufficient experience, it is recommended to go to Apple after-sales to replace the battery; please be sure to discharge the iPhone battery to below 25% before operation, and disconnect the charging cable; note that the lithium-ion battery may explode if accidentally punctured; Turning on the iPhone will affect the waterproof performance; if you replace the battery yourself, you will not be able to enjoy the warranty service.
step 1
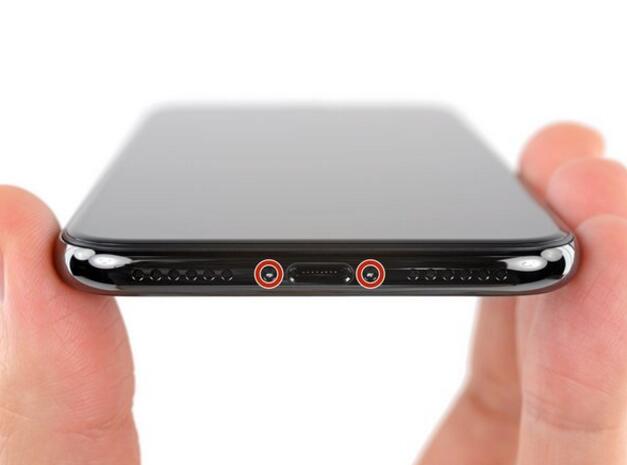
Remove the two long 6.9mm torx screws on the bottom of the iPhone.
Step 2
Using a hair dryer to heat the bottom edge of the iPhone will help soften the adhesive holding the display, making it easier to open.
Step 3
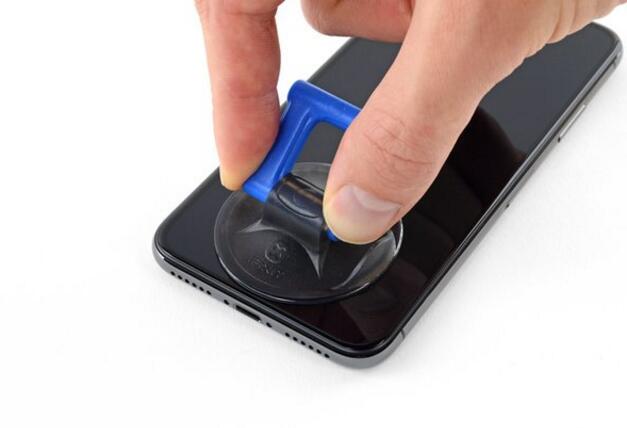
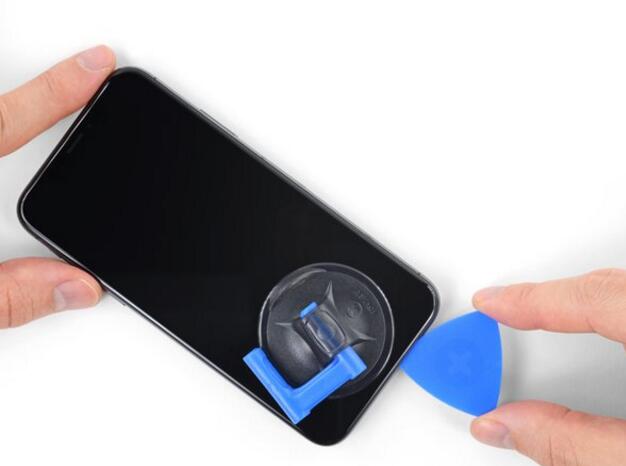
Using a single suction cup, apply it to the bottom edge of the phone while avoiding the curved part of the glass.
Step 4
Pull up on the suction cup firmly to create a slight gap between the front panel and the rear case, and insert an opening pick into the gap. Slide the opening pick along the lower left corner and the left edge of the iPhone to cut the adhesive holding the display.
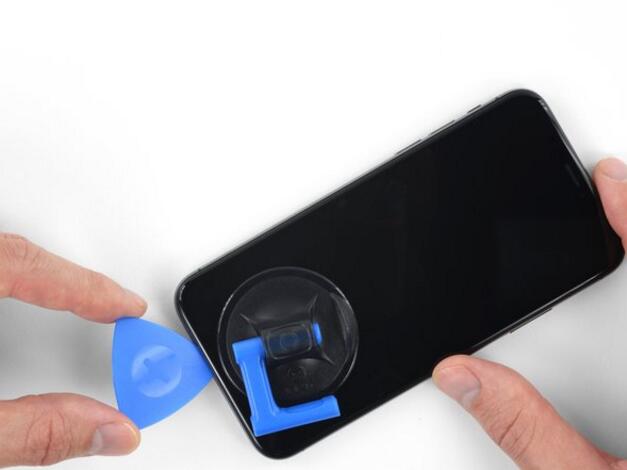
Do not insert the opening too far into the iPhone, as this may damage the internal components.
Step 5
Reinsert the opening pick to the bottom edge of the iPhone and slide it to the right to continue separating the adhesive.
Step 6
Slide under the display along the top edge of the iPhone to release the adhesive in the last area.
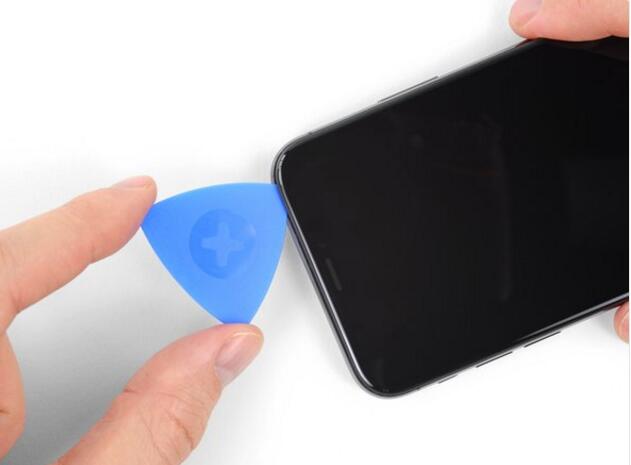
Do not insert an opening pick into the display bezel. Doing so may damage the front panel sensor array.
Step 7
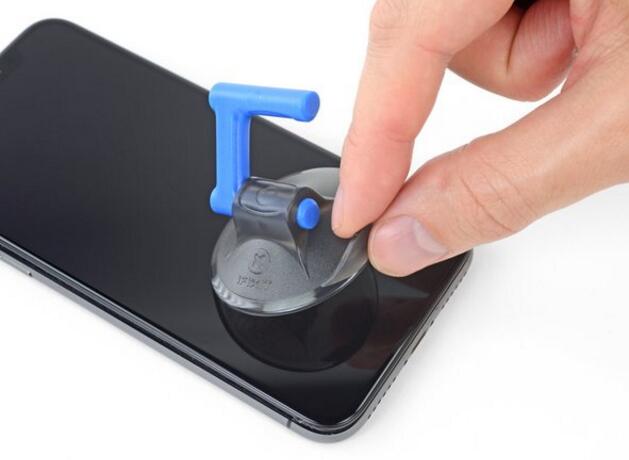
Pull on the small tab on the suction cup to remove it from the front panel.
Step 8
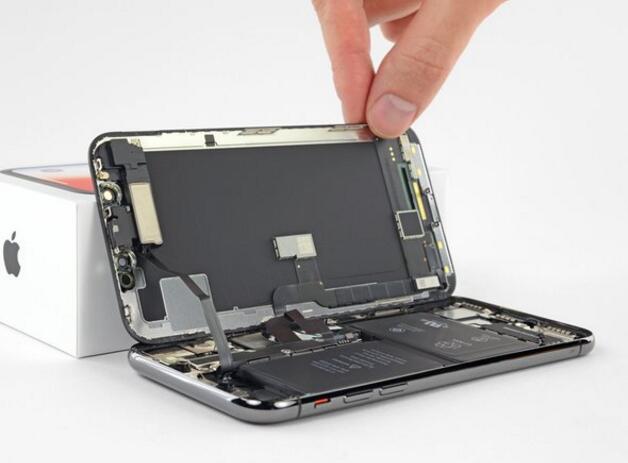
Swing the display up from the left to open your iPhone, like flipping through a book. Be careful not to completely separate the display at this point, as several fragile ribbon cables still connect it to the iPhone's motherboard.
Step 9
Unscrew the 5 screws of the following length Y000 that secure the motherboard bracket:
3 1.1mm screws
1x 3.1mm screw
1x 3.7mm screw
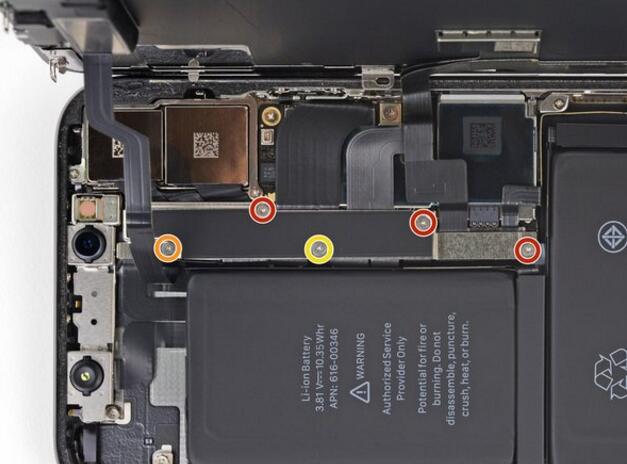
When doing this step, take care to remember the location of each screw and screw it back exactly during installation.
Step 10
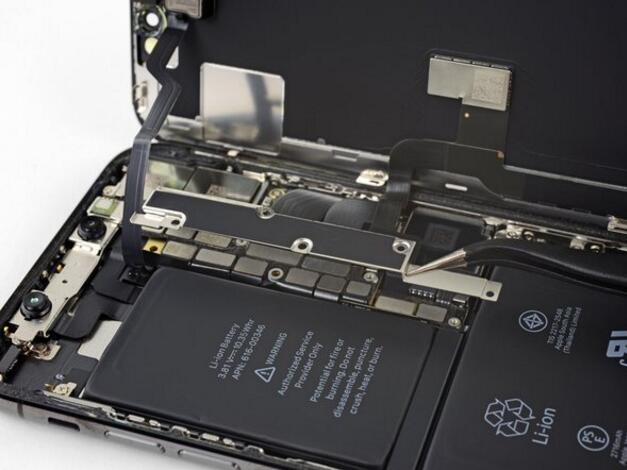
The back cover may be sticking lightly, separate it with steady and slow force.
Step 11
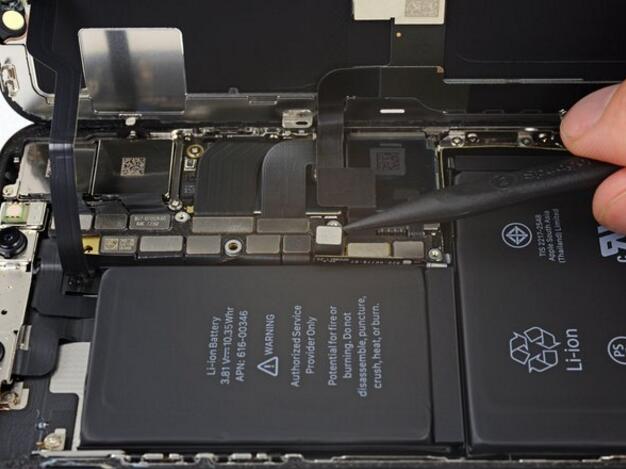
Pry the connection between the battery and the motherboard, try not to damage the black silicone grease around the motherboard or other boards, which is used to enhance the waterproof and dustproof capabilities. Gently open the interface to prevent the motherboard from accidentally connecting to the battery and turning on the power of the mobile phone.
Step 12
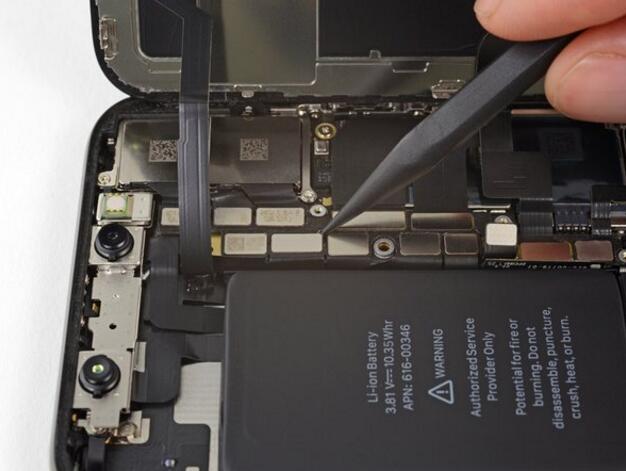
Disconnect the front panel sensor.
Step 13
Pry off the plug of the OLED panel cable.
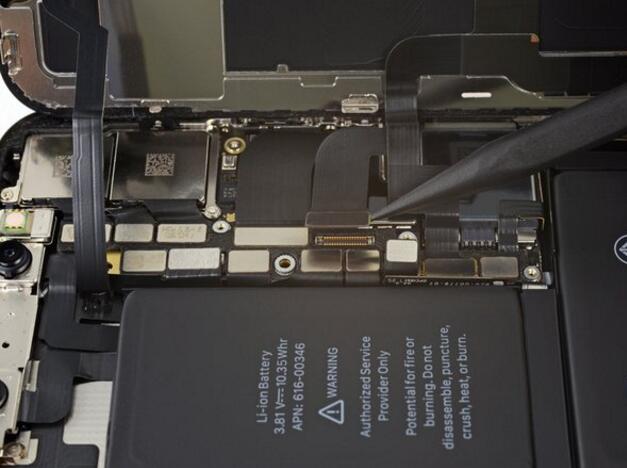
Step 14
Pry the plug of the data cable from the socket.
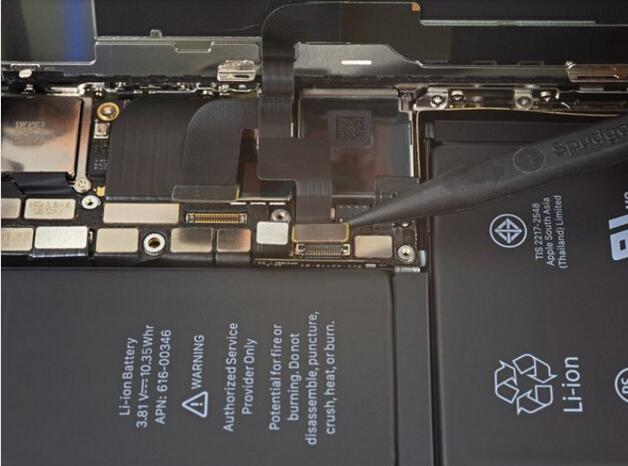
Step 15
The flex cable of the front panel sensor group is stuck with a little bit of glue here. Carefully lift the cable until the glue is separated.
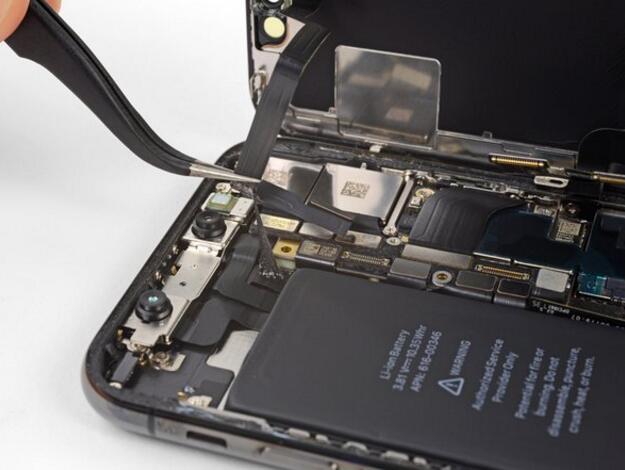
Step 16
Remove screen components.
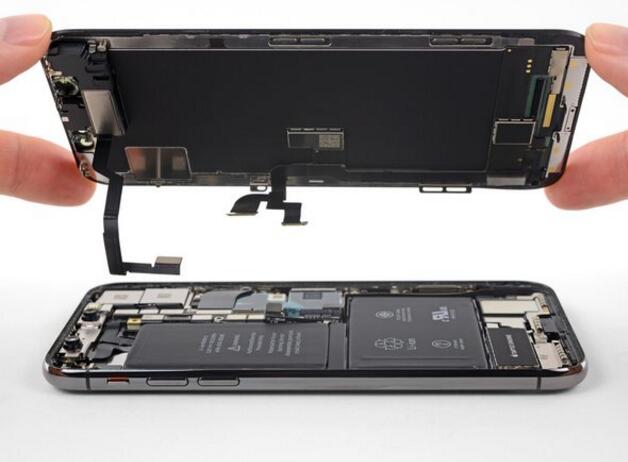
Step 17
Remove the 7 screws from the metal shield above the Taptic Engine and speaker:
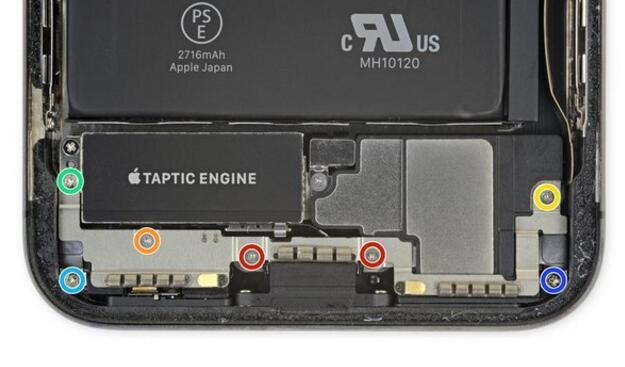
Two 1.9mm Y000 screws
One 1.2mm Y000 screw
One 1.6mm Y000 screw
One 2.4mm Phillips screw
One 1.7mm Phillips screw
One 1.5mm Phillips screw
Step 18
Lift the metal bracket from the edge closest to the battery. Do not remove it completely, there is still a small flex cable attached to it.
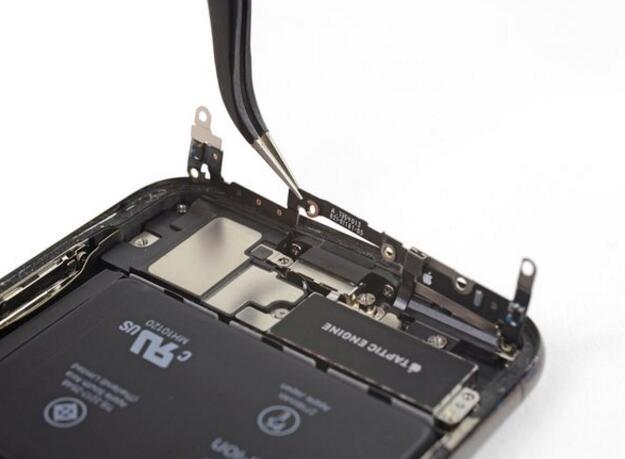
Step 19
While removing the metal cover, use the tip of a spudger to disconnect the cable underneath.
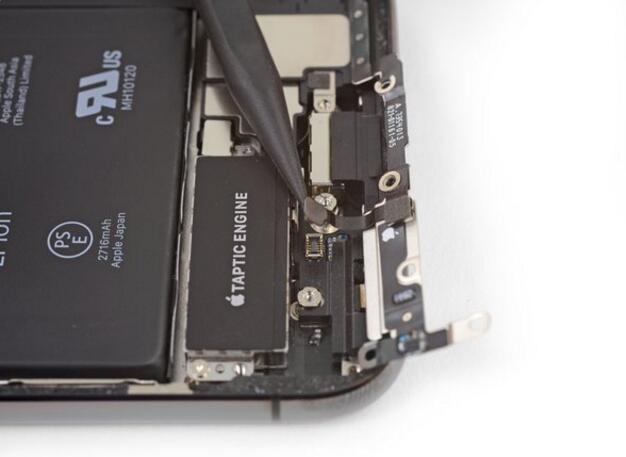
Step 20
Remove the metal cover, Taptic Engine and speakers.
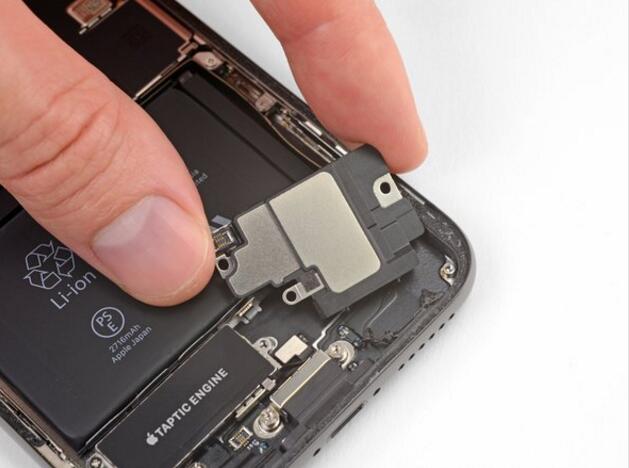
Step 21
The iPhone X's battery is attached to the back of the phone by four easy-pull strips—one on the top and three on the bottom. At the end of each strip is a black pull tab slightly glued to the edge of the battery.
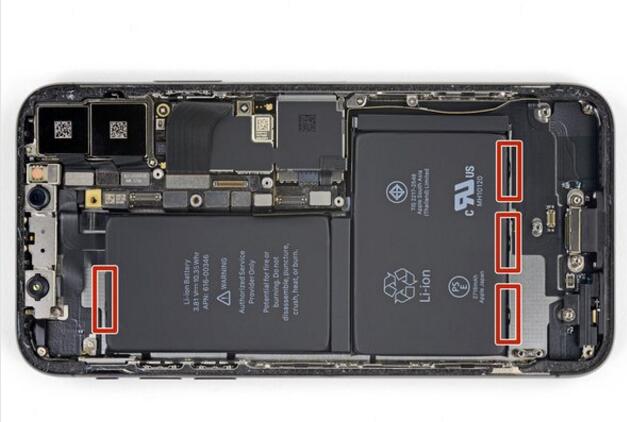
Step 22
Separate the first battery's tape pull from the edge of the battery. There is a small round hole in the center of each pull bar, and if it is difficult to pick up the pull bar, you can use a tool to pull it through the hole.
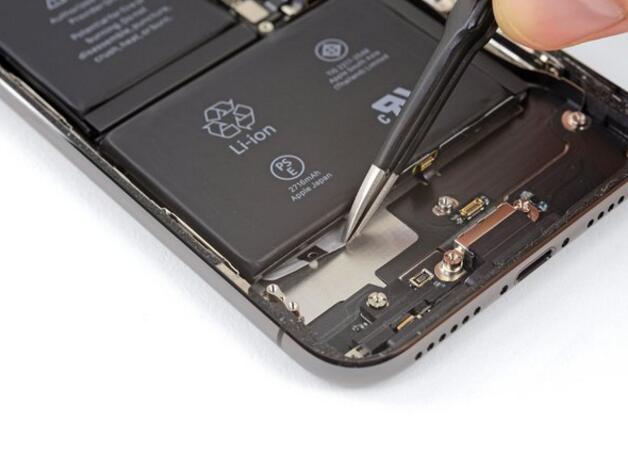
Step 23
Pull up on the pull tab on the last piece of tape on the edge of the upper battery.
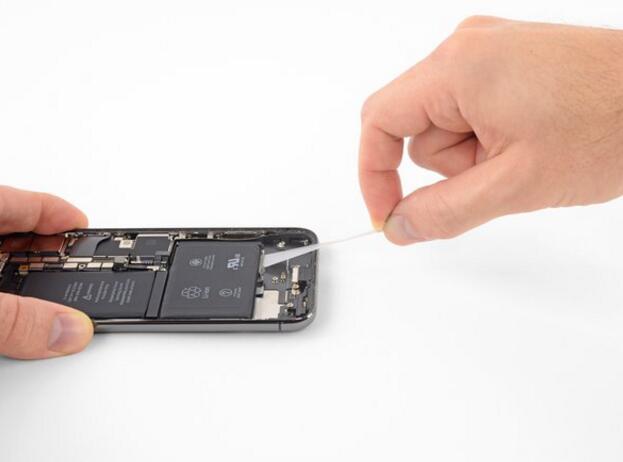
Step 24
Pull up and remove the last adhesive strip.
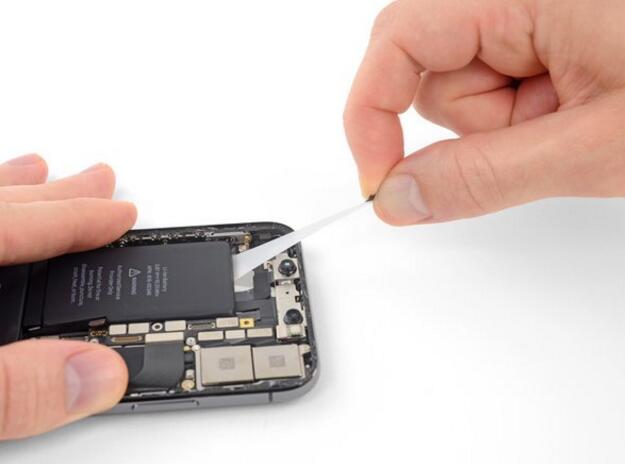
Step 25
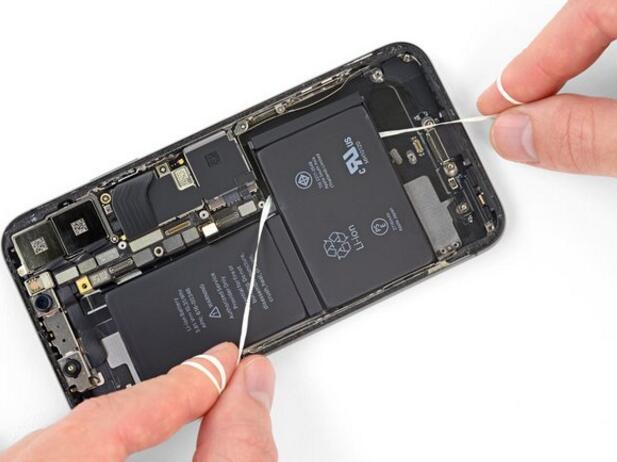
Thread a sturdy thin wire under the battery and pull the thin wire like a wood saw to separate the adhesive strip under the battery.
Step 26
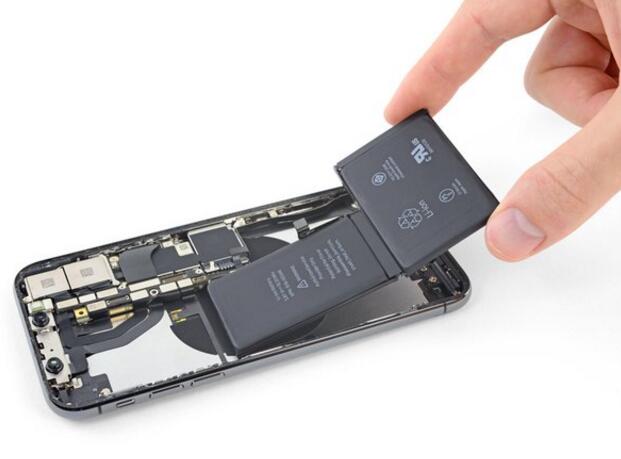
Take out the old battery and replace it with a new one, refit the removed parts, and you're done
 sales@batterydeji.com


